

How to Remove a Tick from Your Dog - Step-by-Step Guide
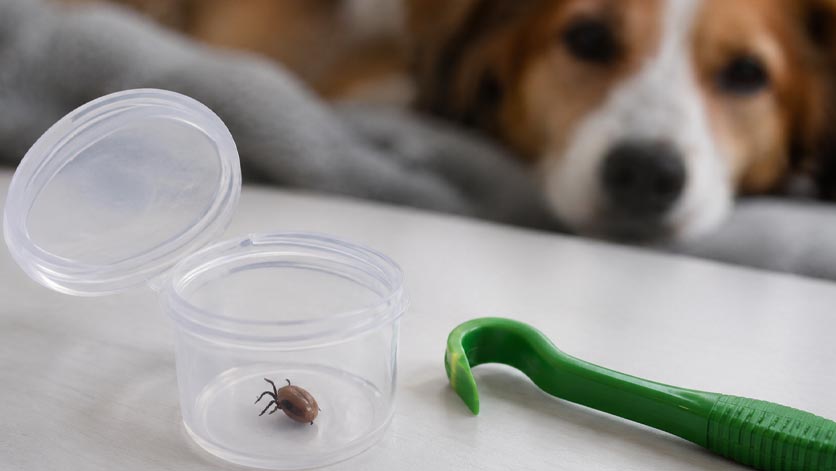
A long walk through forests, meadows and open countryside is one of the highlights of the day for many dogs. They happily explore their surroundings, sniff along paths and enjoy the freedom of being outdoors. Unfortunately, these adventures sometimes come with unwanted passengers. Ticks are among the most common external parasites affecting dogs. They are small, often difficult to spot and capable of transmitting potentially serious diseases.
Discovering a small, dark lump beneath your dog's fur can be unsettling. In many cases, it turns out to be a tick that has already attached itself to the skin. The good news is that most ticks can be removed safely at home with the correct tools and a careful approach.
The most important rule is to act promptly. The sooner a tick is discovered and properly removed, the better. Successful removal does not require force. It requires patience, the correct technique and an understanding of what should be avoided.
With a few simple precautions, dog owners can protect their four-legged companions from unnecessary discomfort and help reduce the risk of tick-borne infections.
Why Ticks Can Be Dangerous for Dogs
Ticks are blood-feeding parasites commonly found in grass, bushes, woodland and other areas with vegetation. When a dog brushes against these plants, ticks can attach themselves to its fur. They then search for a suitable place to bite and begin feeding.
Ticks often prefer areas where the skin is relatively thin or the fur is less dense. Common attachment sites include the ears, neck, armpits, groin and spaces between the toes. However, ticks can attach almost anywhere on a dog's body.
A tick bite may initially cause little or no noticeable discomfort. The main concern is that certain ticks can carry infectious organisms and transmit them while feeding.
Tick-borne diseases affecting dogs include Lyme disease, anaplasmosis, ehrlichiosis and babesiosis. The likelihood of encountering these diseases varies according to geographical location, tick species and local environmental conditions.
Ticks are also a concern in southern European countries such as Spain, where different species and disease-causing organisms may be present compared with Central and Northern Europe. Dogs that spend considerable time outdoors or regularly travel with their owners may therefore require additional protection.
It is important to remember that not every tick carries a disease and not every bite results in infection. Nevertheless, tick bites should never be ignored.
Some pathogens require a relatively prolonged feeding period before transmission occurs, while others may be transmitted sooner. There is no universally safe period during which an attached tick can be left untreated.
Another common misconception is that ticks are only active during spring and summer. In reality, certain species remain active during mild autumn and winter weather. In warmer climates, exposure may occur throughout much of the year.
Regular tick checks should therefore become a normal part of responsible dog care, rather than an occasional precaution.
How to Remove a Tick from Your Dog: Six Simple Steps
Once an attached tick has been discovered, it should be removed as soon as reasonably possible. Fine-tipped tweezers, specialised tick-removal forceps and tick-removal tools are commonly used for this purpose.
The key is to grasp the tick as close to the dog's skin as possible without squeezing its swollen body.
Step 1: Keep Your Dog Calm and Comfortable
Before attempting removal, encourage your dog to sit or lie down in a comfortable position.
Choose a quiet, familiar environment and speak reassuringly. If your dog is particularly restless, ask another person to help keep it calm and gently prevent sudden movements.
Avoid rushing the procedure. Dogs may react sensitively when touched around their ears, paws or other delicate areas.
A calm approach makes the process safer for both the dog and the person removing the tick.
Step 2: Locate and Expose the Tick
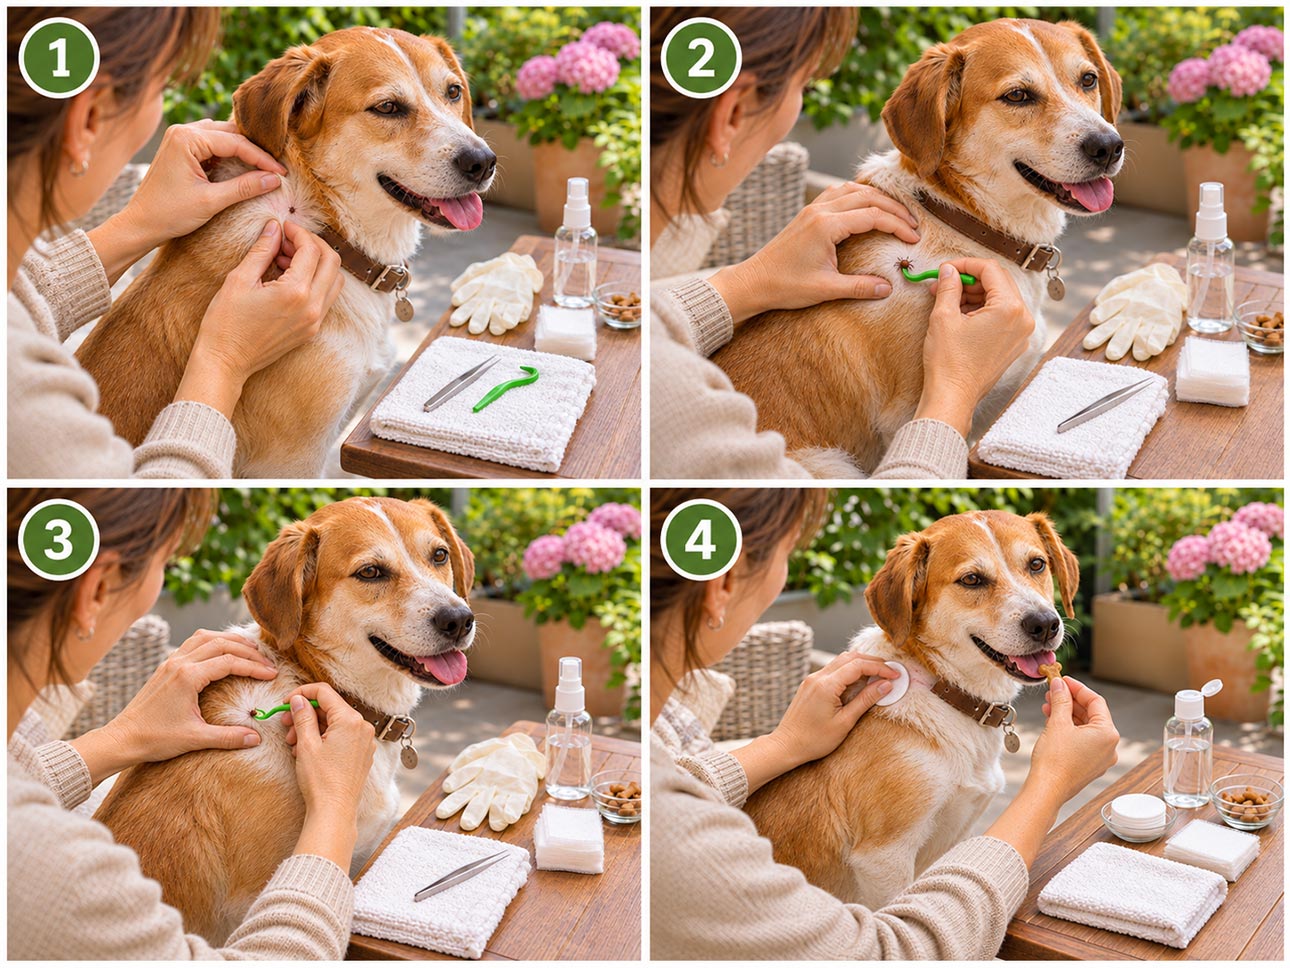
Carefully separate the surrounding fur with your fingers until the tick is clearly visible.
Good lighting is particularly important when dealing with small ticks or dogs with long, thick coats.
It may help to hold the fur aside with one hand while preparing the removal tool with the other.
Take a moment to identify where the tick is attached to the skin. This allows the tool to be positioned accurately and helps prevent accidental pulling on the dog's fur.
Step 3: Position the Tick-Removal Tool Correctly
Using fine-tipped tweezers or suitable tick-removal forceps, grasp the tick as close to the skin as possible.
Try to hold the tick near its mouthparts rather than squeezing its enlarged abdomen.
If using a specialised tick hook or removal card, carefully follow the manufacturer's instructions. Different tools may require slightly different techniques.
The aim is always to remove the parasite without unnecessary pressure, sudden movements or injury to the dog's skin.
Step 4: Remove the Tick Slowly and Steadily
When using fine-tipped tweezers, pull the tick straight out with slow, steady and even pressure.
Do not jerk or suddenly yank the tick.
It may take a moment before the parasite releases its hold. Remaining patient is more effective than applying excessive force.
A common misconception is that ticks must always be twisted to remove them. Twisting is not necessary when using ordinary tweezers. A steady, straight pulling movement is the recommended technique.
However, certain specialised tick hooks are designed to be rotated. Always follow the instructions supplied with the specific tool.
Step 5: Clean and Inspect the Bite Area
Once the tick has been removed, carefully inspect the affected skin.
A small amount of redness or mild irritation immediately after removal is not unusual.
Gently clean the area with water and mild soap or an antiseptic product suitable for dogs.
Wash your hands thoroughly and clean the removal tool after use.
Continue to observe the bite site over the following days for increasing redness, swelling or signs of inflammation.
Step 6: Dispose of the Tick Safely
Never crush a removed tick between your bare fingers.
Place it in a secure container or dispose of it safely.
If your dog subsequently develops unusual symptoms, keeping the tick in a sealed container may be useful when discussing the incident with your veterinarian. However, testing a tick for pathogens cannot determine whether your dog has actually become infected.
Do not apply oil, petroleum jelly, alcohol, nail polish or glue to an attached tick in an attempt to make it detach.
Similarly, never try to burn a tick off with a match or lighter. These methods are ineffective or potentially harmful and should be avoided.
Occasionally, small parts of the tick's mouthparts may remain embedded in the skin after removal. This can cause local irritation but does not necessarily mean that the entire tick is still present.
Avoid digging into the skin with a needle or sharp object. If the remaining material cannot be removed easily, or if the area becomes increasingly inflamed, consult your veterinarian.
After a Tick Bite: Warning Signs, Monitoring and Prevention
Removing the tick is the most important immediate step, but responsible care does not end there.
Over the following days and weeks, keep an eye on your dog's general health and the condition of the bite site.
A small red mark or temporary swelling may occur after removal. However, increasing inflammation, heat, tenderness, discharge or persistent irritation should be examined by a veterinarian.
Changes in your dog's behaviour may also deserve attention.
Unusual tiredness, reduced appetite, fever, stiffness, limping or swollen joints can sometimes be associated with tick-borne infections.
More serious symptoms, including pale gums, dark or reddish urine, yellowing of the gums or eyes, marked weakness or neurological abnormalities, require prompt veterinary attention.
These symptoms can have several different causes, so a proper examination is essential rather than assuming that a recent tick bite is responsible.
It is helpful to record the date on which the tick was discovered. Taking a photograph of the bite site or noting its location can make it easier to recognise changes later.
If veterinary treatment becomes necessary, always mention any recent tick exposure, especially after travelling to another country.
Prevention remains one of the most effective ways to reduce tick-related health risks.
After walks through woodland, grassy fields, parks or areas with dense vegetation, thoroughly check your dog's coat.
Start around the head and ears before moving down the neck, shoulders, chest, back and legs. Do not forget the underside of the body, the groin, underneath the collar and between the toes.
Running your fingertips carefully through the fur can help detect ticks that might otherwise remain hidden. A suitable grooming comb may also be useful.
In addition to regular checks, veterinarians can recommend various tick-control products, including spot-on treatments, protective collars and oral medications.
These products differ in how they work. Some kill ticks after contact or feeding, while certain formulations also provide repellent protection.
The most suitable option depends on your dog's age, weight, health, lifestyle and geographical location.
Special precautions may be necessary in households with cats because certain ingredients used in dog parasite treatments can be highly toxic to cats.
Home remedies such as garlic and essential oils should not be relied upon as substitutes for proven parasite-control products. Some substances may even be harmful to pets.
A reliable tick-prevention routine does not need to be complicated. Regular coat inspections, appropriate veterinary-recommended protection and the correct removal technique can make a meaningful difference.
If you discover a tick on your dog, remain calm, use the proper tool and remove it promptly.
With sensible precautions and a little attention after every outdoor adventure, you can help your dog enjoy the great outdoors while reducing the risks associated with these unwanted parasites.
After all, time spent exploring nature together should be about fresh air, exercise and shared experiences, not unnecessary worries about ticks.